


As a bodybuilder, measuring your progress may be excruciatingly difficult. Whenever you step on the dimensions, you get a number that tells you nothing concerning the ratio of fat to muscle. When the dimensions goes up, you hope you are adding lean muscle tissue, but there’s that nagging doubt that it’s actually fat.
You check your physique within the mirror each day but find it hard to identify any differences. Since you see your body so often, it could possibly seem that your progress is stagnating.
There has got to be a greater method for tracking progress as a bodybuilder.
There’s; taking progress pics. Photos provide an objective standard for comparison. They do not lie, so you may clearly see how your body is changing. But progress pictures are only useful in the event you know tips on how to take them properly. This text provides seven suggestions for bodybuilders to take quality progress pictures they will use to gauge their progress.
7 Suggestions for Awesome Bodybuilding Progress Photos
As a veteran personal trainer, I’ve worked with loads of competitive bodybuilders. Because of this, I’ve often been the guy on the opposite end of the camera taking progress pics within the months and weeks leading as much as a contest. Listed here are my seven top suggestions for taking quality progress pictures:
1. Consistent Lighting
If possible, take your photos in natural light. Ensure that your photo shoot is at the identical time of day to make sure the same lighting. If you may have to make use of artificial light, make sure that you utilize the identical source. A consistent light source will will let you objectively compare changes in muscle size and definition without being encumbered by shadows that hit the body in another way.
2. Neutral Background
You need to stand against a neutral background. It will prevent the background from becoming a distraction, allowing the attention to focus directly in your muscles. Find an excellent spot to do your progress pic shoot and use it each time.
3. Fixed Camera Placement
The camera must be positioned at the identical height and distance out of your body for each photo shoot. If it’s closer or further away, you will discover it not possible to measure your progress. You need to also get a trusted person to really take the photos. Don’t attempt to take mirror selfies unless you may have no other option!
Mark the spot where your photographer is standing and be aware of the gap from you so which you can replicate this positioning each time. Ensure that, too, that your entire body is visible in every shot.
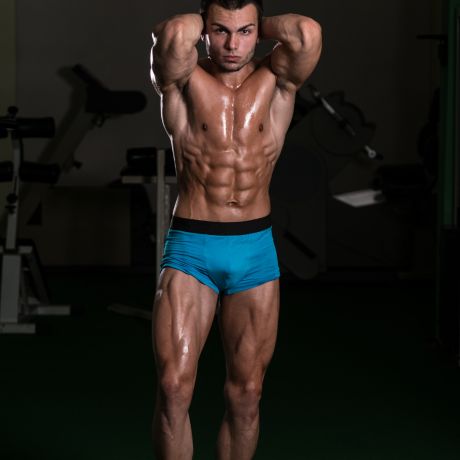
4. Same Poses and Angles
Use the identical positions and poses in every photo. My suggestion is to learn tips on how to do the bodybuilding mandatory poses and have a photograph taken in each of them. I’ll cover those later within the article.
5. Regular Schedule
Arrange a schedule so that you simply are taking your progress photos at regular intervals. Which means taking them on the identical day at the identical time.
I suggest not taking your photos straight after a workout. In the event you do, your muscles can be artificially inflated attributable to the pump effect. Moreover, in the event you change up your routine so that you simply’re training chest before one shoot and legs before one other, you’ll see the results of a pump in numerous parts of the body. It will give you a false picture of your progress.
Within the bodybuilding offseason, I suggest you are taking progress photos once per 30 days. Then, whenever you begin your pre-contest weight-reduction plan (typically 12 weeks out from the show), start taking pics every week.
6. Same Clothes
Wear the identical outfit for your whole progress photos. This could consist of the posing trunks that you simply can be wearing on stage. Women must also wear the bikini they’ll be competing in on stage.
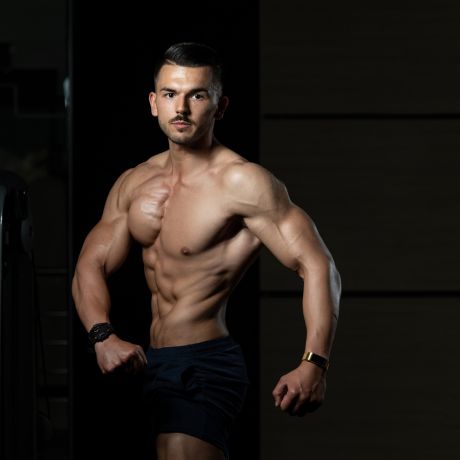
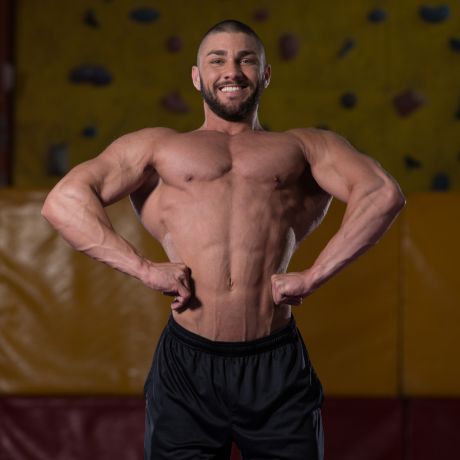
In the event you are a non-competitive bodybuilder, wear minimal clothing to display your whole skeletal muscle groups. This may very well be a pair of shorts and no top for guys and shorts and a crop top or sports bra for the women.
7. Document Additional Information
Regardless that your progress photos will provide precious details about your bodybuilding progress, you should not rely solely on them. I like to recommend that you furthermore mght take body measurements every month. Run the tape around the next body parts:
- Upper arms
- Shoulder girth
- Chest
- Waist
- Quads
- Calves
You need to even have your body fat percentage taken once a month. It will let you know the composition of your body when it comes to fat and muscle tissue. Mix these metrics along with your progress photos to get an overall picture of your bodybuilding progress.
The Poses
Here’s an outline of the poses you’ll have to hit on a bodybuilding stage, together with some recommendations on tips on how to do them properly:
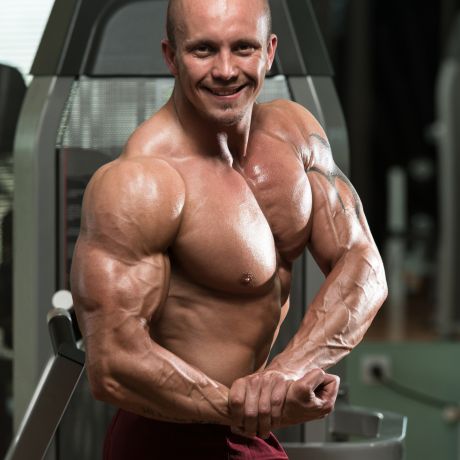
1. Front Relaxed
- Stand with feet shoulder-width apart and arms hanging naturally by your sides.
- Chill out your shoulders and keep them squared.
- Maintain a straight posture along with your chest up and abdominals engaged.
- Avoid excessive leaning forward or backward.
- Keep your head up and facing forward with a confident expression.
- Chill out your facial muscles and avoid tensing or grimacing.
2. Side Relaxed
- Stand sideways with one foot barely in front of the opposite for stability.
- Allow your arms to hold naturally by your sides.
- Keep your shoulders relaxed and squared, avoiding any hunching.
- Stand tall along with your chest up and abs tight.
- Place the hand on the side closer to the audience gently in your hip or thigh for a subtle pose.
- Bring your back arm across your upper stomach, pushing your back pec out.
- Keep your head up and facing forward, maintaining a neutral expression.
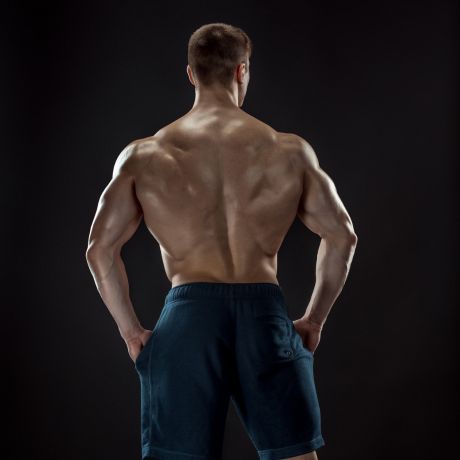
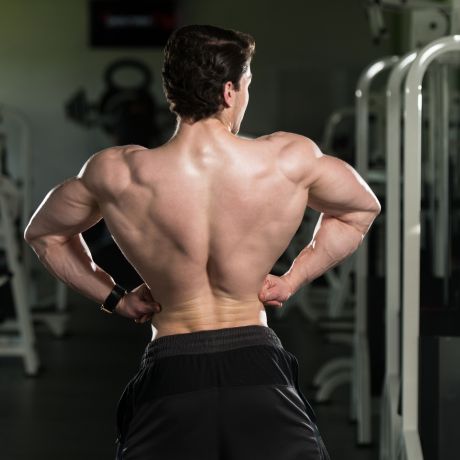
3. Back Relaxed
- Allow your arms to hold naturally by your sides.
- Keep your shoulders relaxed and avoid hunching forward.
- Maintain straight posture along with your chest up and abs engaged.
- Avoid arching your back excessively.
- Keep your head up and facing forward or barely tilted downwards.
- Chill out your facial muscles and maintain a composed expression.
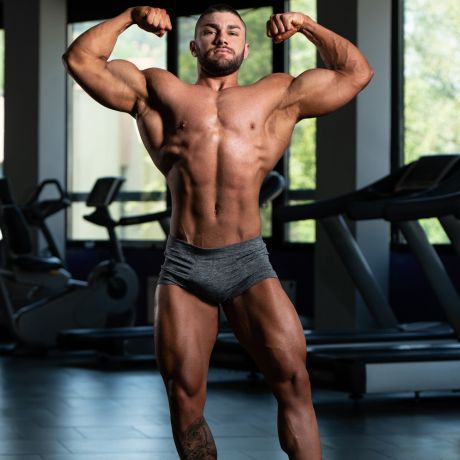
4. Front Double Biceps Pose
- Stand upright with feet shoulder-width apart, toes pointed barely outwards.
- Flex calves and quadriceps.
- Contract each biceps concurrently, bringing them up towards your shoulders.
- Flex your chest and abs while keeping a straight back.
- Flare out your lats to create width.
- Keep your head up and maintain a confident expression.
5. Front Lat Spread
- Stand with feet shoulder-width apart, toes mentioning at around a 45º angle.
- Flex your calves and quads.
- Bring each arms back like doing a row, anchor your thumb just above your hips in your back, and flare your elbows out.
- Flex your lats by spreading them wide, pushing your chest forward.
- Barely tilt your pelvis forward to emphasise your abdominal definition.
- Keep your head up and maintain a proud posture.
6. Side Chest Pose
- Stand sideways along with your foot farthest away from the camera barely behind the opposite.
- Bend your knees barely, along with your front foot on tip-toes, push your leg against your back leg.
- Extend the arm closest to the audience towards the front, bring the opposite arm across your body to know the wrist or forearm of the prolonged arm.
- Then bend your front arm at a 90-degree angle, flexing your arm muscles.
- Use your back arm to assist push your rear pec up. Contract your chest muscles while keeping your abs tight.
- Twist your torso barely towards the audience to focus on your chest and shoulder definition.
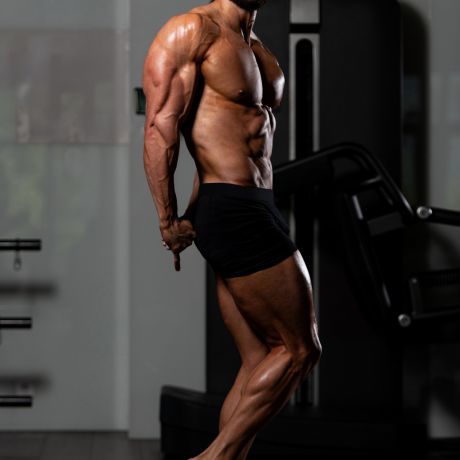
7. Side Triceps Pose
- Stand sideways with one foot in front of the opposite.
- Pull the arm closest to the audience towards the rear, bending it at a 90-degree angle.
- Use the alternative hand to grab the wrist, forearm, or fingers of the front arm behind your back.
- Straighten your front arm while flexing your triceps, keeping your shoulder and chest muscles tight.
- Twist your torso barely towards the audience to showcase triceps definition.
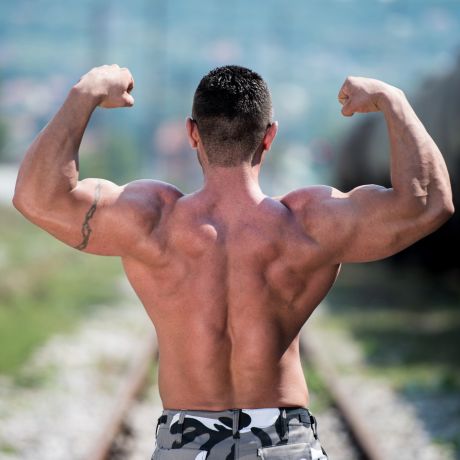
8. Back Double Biceps Pose
- Stand with feet shoulder-width apart, facing away from the audience.
- Kick one leg back barely resting in your tip-toe.
- Flex your calves, hamstrings, and glutes.
- Extend each arms to the perimeters, bending them at 90-degree angles.
- Bring each fists towards your shoulders, contracting your biceps and squeezing your shoulder blades together.
- Flex your back muscles, especially the lats, to create width.
- Keep your head turned barely towards the audience and maintain a robust, upright posture.
9. Back Lat Spread
- Start along with your base, legs about shoulder-width angled out, one leg kicked back on tip-toe with calf flexed.
- Flex your other calf, hamstrings, and glutes.
- Pull each arms back, with elbows tucked like you might be performing a row.
- Anchor your thumb toward your love handle area, just above your hips.
- Flare your elbows out, spreading your lats as wide as they’ll go.
- Hinge backward a really small amount.
- Keep your head turned barely towards the audience and maintain a proud posture.
10. Abs and Thigh Pose
- Stand upright with feet shoulder-width apart.
- Place one hand behind your head and the opposite hand in your hip or thigh.
- Flex your abs and thighs concurrently, pushing them forward to showcase definition.
- Barely twist your torso to the side to focus on oblique muscles.
- Keep your head up and maintain a confident expression.
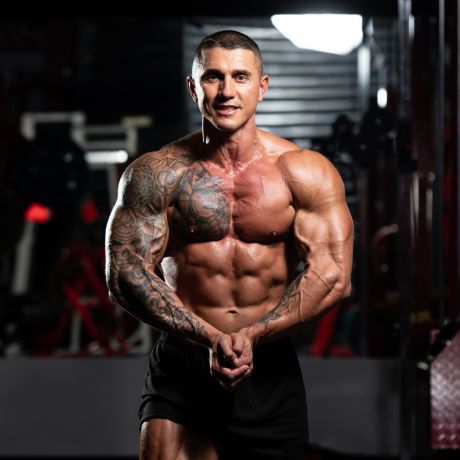
11. Most Muscular Pose
- Stand upright with feet shoulder-width apart.
- Bend your knees barely and lean forward.
- Clasp your hands together in front of your torso, with elbows out to the perimeters.
- Flex your chest, shoulders, and arms while pushing your elbows forward.
- Contract your abs and flare out your lats to create a large, powerful look.
- Keep your head up and maintain a fierce expression.
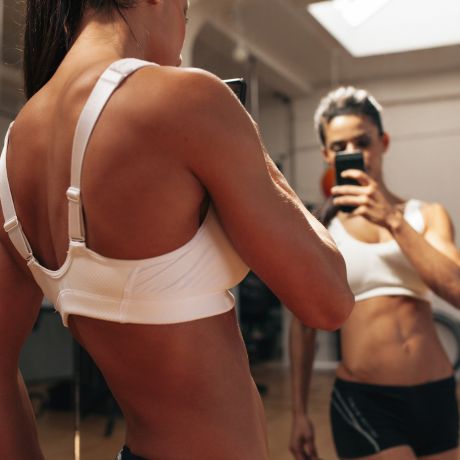
Suggestions for Solo Photo Shoots
In the event you do not need the posh of one other person readily available to take your progress photos, you’ll have to take selfies along with your digital camera. Listed here are some suggestions that may be used along with those already given to get the very best final result:
- Stand in front of a full-length mirror with a plain wall on the opposite side.
- Hold the camera at chest or shoulder level.
- Attempt to get as much of your body within the frame as possible.
- Ensure that your body is centered and fills the frame without cutting off your arms or legs.
How Progress Photos Keep You On Track
in the event you’re a bodybuilder, there’s nothing more motivating than knowing that you simply are making consistent gains. Getting that knowledge through progress pictures will fuel your energy for much more progress. But that is not the one way that progress shots can keep you on course.
A 2013 study, published within the journal Translational Behavioral Medicine, revealed that folks who share their progress photos on social media lost more weight than those that didn’t share. The researchers noted that the social support from other social media users who viewed and commented on the posted images was a vital motivating factor for the individuals who posted their progress pictures.¹
Progress photos also keep us accountable. As I discussed on the outset, it could possibly be very difficult to note muscle gain and fat loss from day after day. But progress photos give you an objective assessment. As well as, the very knowledge that you simply can be documenting your progress on film can push you to work harder within the gym and stay on course along with your weight-reduction plan.
Wrap Up
Taking regular progress pictures is one of the best ways for bodybuilders to gauge whether or not they’re constructing muscle month to month. Remember to make use of the identical pose, same conditions, and same times to be sure that you are comparing apples with apples.
I also recommend sharing your progress photos with others on social media or in your personal circle. The positive reinforcement you receive will fuel your motivation to bring it within the gym and within the kitchen.
References: